

Written by Nathan Anderson
In my last post in this series, we looked at physical entry bypass techniques before Brad followed up with more details on the under-door tool we discussed. As I mentioned last time, when I perform red team and physical social engineering (PSE) assessments, I prefer to start with the methods that present the least risk first and move on to riskier options if those don’t work.
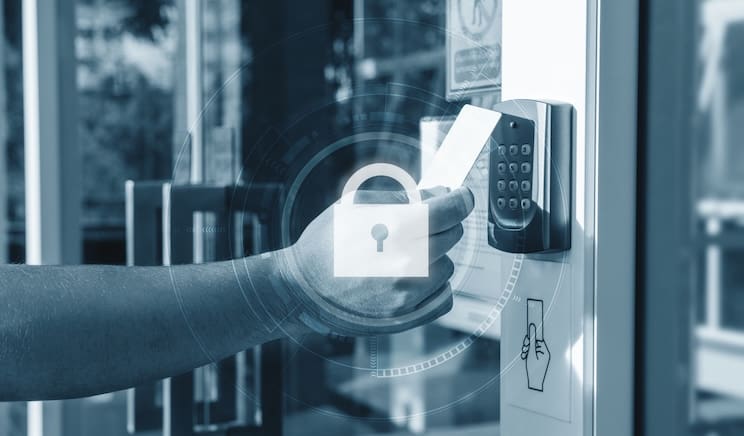
Badge cloning is a fairly low-risk attack, but it does require the right tools and some expertise. Let’s jump in.
Getting Started
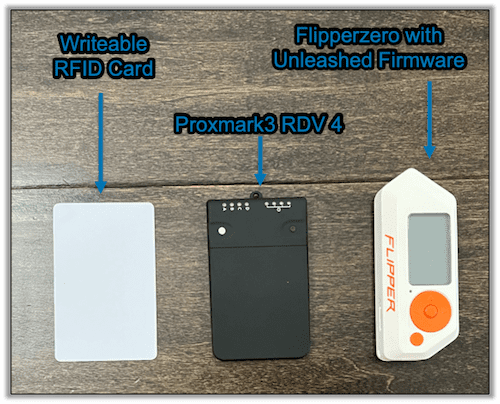
Badge cloning is the first entry-to-bypass tactic we’ve discussed that is more technical. We use tools like Flipper Zero with unleashed-firmware, Proxmark3, and Keysy, all in tandem with some social engineering.
We can try to clone employee key fobs either in the target area, offsite at corporate events, or anywhere employees might gather in close proximity. One of our team members even followed a group of employees to lunch and cloned their badges at the restaurant while waiting to be seated.
We’ve used tactics like cloning a badge that has been left on a desk, bumping into people to clone their badge, or impersonating IT to verify a targeted individual’s badge is “working.”
The Tools
Every cloning device has its pros and cons, which is why it’s important that you speak with your client about what type of access control system they use. There are tools out there to attack most systems, so it’s just a question of what you need to pack in your bag.
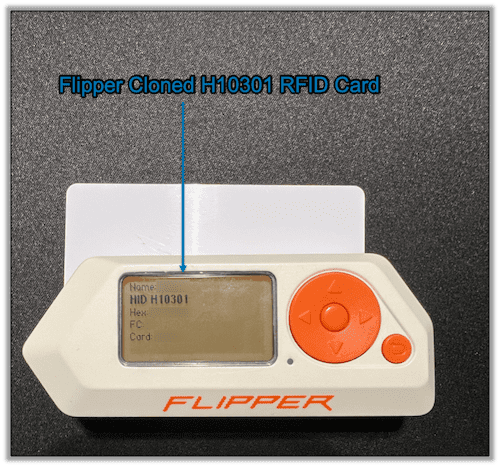
Flipper Zero with unleashed firmware is limited on the types of RFID it can fully clone and emulate. Additionally, some fobs have to make full contact to the Flipper Zero for up to 15 seconds (depending on the type).
The Proxmark3 RDV 4 used with a long-range antenna can clone devices up to 133mm away, but there must be at least external power supplied to it and for full functionality, a control device connected to it.
The Keysy cloner can only handle Low Frequency RFID cards and has to make full contact with the card. I haven’t played with this one yet, but I’ve read up on it and look forward to testing it out in the future.
Flipper Zero Setup
We keep speaking of Flipper Zero with the unleashed firmware, but what is it? Flipper Zero unleashed firmware is a modified version of the original Flipper Zero firmware that adds some additional features, removes some of the restrictions on the device, and preloads a large amount of scripts. Good stuff!
It includes:
- BadUSB Scripts, including scripts to initiate connections to a Command-and-Control network
- SubGhz Scripts
- SubGhz Analyzer
- Numerous NFC Plugins
- And a lot more fun stuff
The team that developed it has a great guide on how to install it, and I highly recommend reading it before you go through your setup process, as it has the potential to change over time and is a little different depending on the device you are using to update the Flipper Zero.
However, it really is as simple as:
- Download the Unleashed Firmware from the GitHub site onto your mobile device that is connected to the Flipper Zero
- Go to the Flipper Zero app on the mobile device
- Go to Firmware Update
- Select Custom Channel
- Select the file you just downloaded from their GitHub site
- Wait until its finished, and you are good to go
Proxmark3 RDV 4 Setup
There are two main ways to use the Proxmark3 RDV4 (PM3). You can use it in standalone mode, or you can use it connected to a system. In standalone mode, you just provide power to the PM3, and you can clone and temporarily store the clone of up to four RFID cards as long as the PM3 remains powered on. Once it loses power, all cloned data is lost. In this manner, it allows for quick cloning and repeating of a badge.
The second method, connected to a system, provides more functionality and storage of the cloned badges. This can be harder to do in the field due to the need to have a system on you at all times, but this risk can be reduced by either purchasing the additional Bluetooth and battery module for the PM3 or by some shifty cable management and a minicomputer, like a Raspberry Pi.
Regardless of how you choose to use the PM3, you have to keep in mind the range with the standard antenna. The standard antenna, which fits in the palm of your hand, has a max range of 85mm. With the long-range antenna, you can reach up to 133mm, but then the PM3 is no longer Pocket size. The long-range antenna is a 5in x 5in square. It is something to keep in mind though, as it still viable to use in a bag or in a stationary position.
Now, before you can use the PM3 in either mode, you must update the PM3. The PM3’s setup is imperative to get right. Doing it incorrectly could result in a bricked device, which nobody likes. It’s very important you follow the instructions created by RFID Research Group (RRG), as setup varies greatly depending on the system you are using. I’ll say it again:
It’s important that you ensure you are following the instructions designed for your combination of system and hardware and potential add-ons you have with your PM3.
You can find those instructions in RRG’s GitHub.
With that said, the below steps are what we used for a standard PM3 connected to a Debian 12 OS. At the time of writing this, the outcome of the following steps resulted in a successful installation:
1. Login as the root user
sudo su2. Update the main system you will use the PM3 with
apt-get update -y && sudo apt-get upgrade -y3. Install the required packages
apt-get install git ca-certificates build-essential pkg-config libreadline-dev gcc-arm-none-eabi libnewlib-dev qtbase5-dev libbz2-dev liblz4-dev libpython3-dev libssl-dev libgd-dev4. Change your directory to /opt and clone the PM3’s GitHub repo
cd /opt && git clone https://github.com/RfidResearchGroup/proxmark3.git5. Very important!! Disable the ModemManager
apt remove modemmanager6. Connect the PM3 to the system and verify it’s being read
sudo dmesg | grep -i usb7. After that, move into the PM3 repo
cd /opt/proxmark38. Clean and compile the software
make clean & make -j9. Install the software
make install 10. As long as it finishes with no error, enter the software
pm311. Then ensure your PM3 is connected and flash the PM3 with its new firmware
pm3-flash-allOnce that finishes, you are set! You are ready to use standalone mode or to use it while connected to a host system.
A Real-Life Badge Cloning Story
I was on a physical social engineering (PSE) assessment where our customer wanted me to attempt to enter a building and specifically get into its server room. I found that I was able to social engineer my way past the front door (more on that in the next post in this series) but had no way to enter the server room.
I noticed that most people had their badges connected to their belts, so I setup the PM3 and palmed it in my left hand. I acted like I was talking on the phone and, when someone passed me by, got it within 3 inches of the target badge to clone it. Afterward, I checked the PM3, found out I had successfully cloned the badge, and accessed the server room without anyone questioning my presence.
A Pretext Can’t Hurt
In case I hadn’t been so lucky and someone had questioned my presence, it’s important to always be ready with some pretext to provide as the reason you are where you are. An unverifiable pretext is always best, with a hard-to-verify pretext as a second-best option.
If you have to name-drop someone you’ve found through your OSINT or while onsite, you had better be ready to book it afterwards unless you are sure they are not around to validate. Finally, always remember to dress to blend in. If the employees wear business casual, then you should too.
Thanks For Reading
I hope you enjoyed this blog, and, if you did, please check out other social engineering posts from our team. Next up in this series is the human art of social engineering itself, so keep an eye on the Raxis blog.
Nathan Anderson
Search The Exploit Blog
Blog Categories
- AI
- Careers
- Choosing a Penetration Testing Company
- Exploits
- How To
- In The News
- Injection Attacks
- Just For Fun
- Meet Our Team
- Mobile Apps
- Networks
- Password Cracking
- Patching
- Penetration Testing
- Phishing
- PTaaS
- Raxis In The Community
- Red Team
- Security Recommendations
- Social Engineering
- Tips For Everyone
- Web Apps
- What People Are Saying
- Wireless
