

BloodHound is a great tool to help find different relationships in a domain. This can often lead to gaining additional access, potentially even administrative access on internal network penetration tests and red team engagements.
The Community Edition
In late 2023 SpecterOps released a completely reworked BloodHound, BloodHound Community Edition (CE). Originally, the program was missing several features but showed promise, and I continued to keep my eye on the project. Here and there I’ve looked into it but never kept up with it. Recently, I decided to take another look and was seriously impressed with the progress and future direction of the project.
Installing BloodHound CE
The installation of the new BloodHound CE is different. The easiest way to install it is with Docker Desktop. Installation of Docker and Docker Desktop is beyond the scope of this post, but I will go over how I installed BloodHound CE within that environment.
Installing BloodHound CE after Docker Desktop is installed is fairly straightforward, especially when using their provided script to install it.
Download the latest release from their GitHub. If you want the default installation, just extract and run it.
Modifying the Install Not to Use Localhost
By default, the BloodHound web interface is only accessible over localhost. This makes sense, but since I was running it on a virtual machine, I wanted it accessible to other machines on my network.
I started by using the check command to download the YAML files for Docker Desktop.
./bloodhound-cli check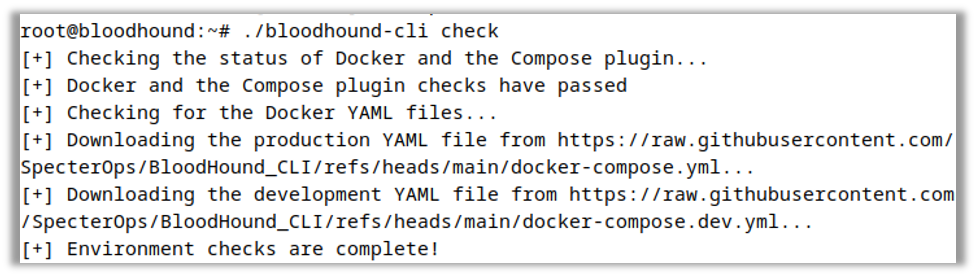
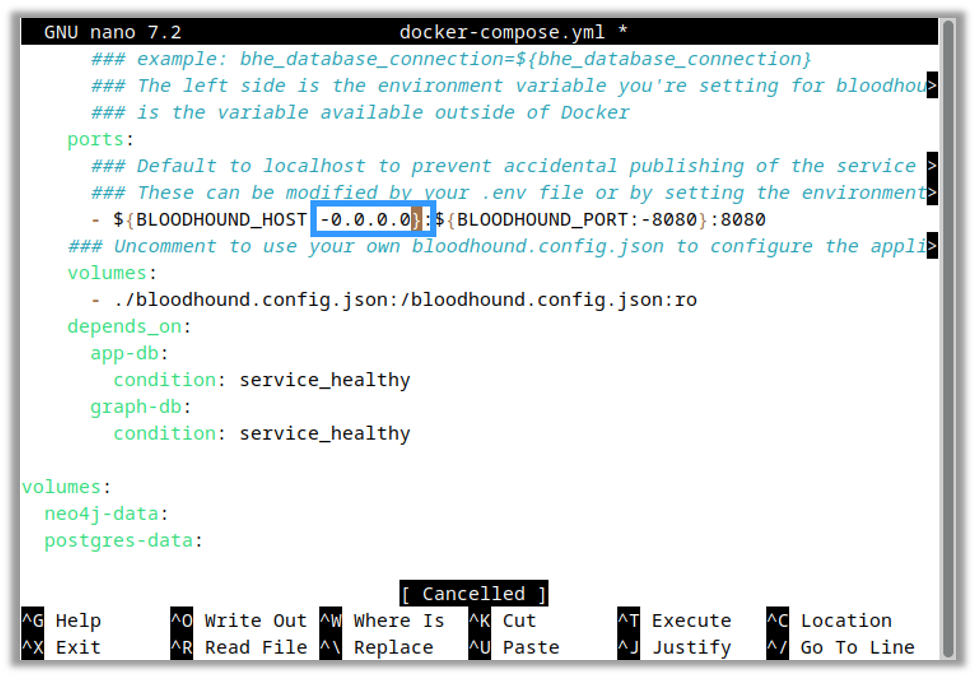
I then navigated to the folder with the YAML files and modified the docker-compose.yaml file so that, by default, the listening interface is 0.0.0.0 and not 127.0.0.1.
After this, I ran the install script using the install command. When the script asked if I wanted to replace the YAML files, I answered no (keeping my modified version with 0.0.0.0).
./bloodhound-cli install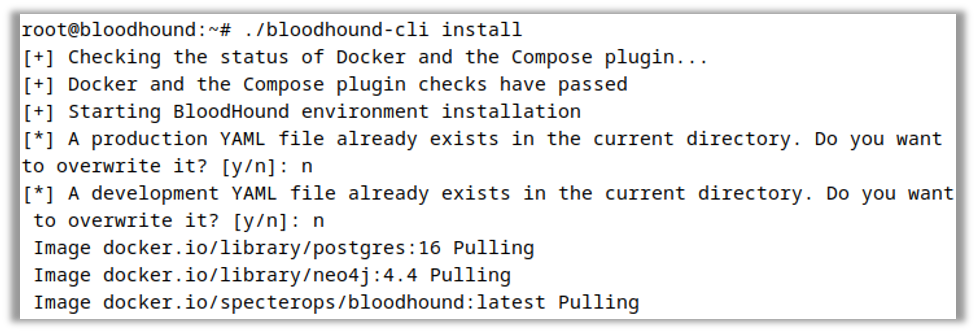
When the script completed, it gave me the password to access the BloodHound UI.
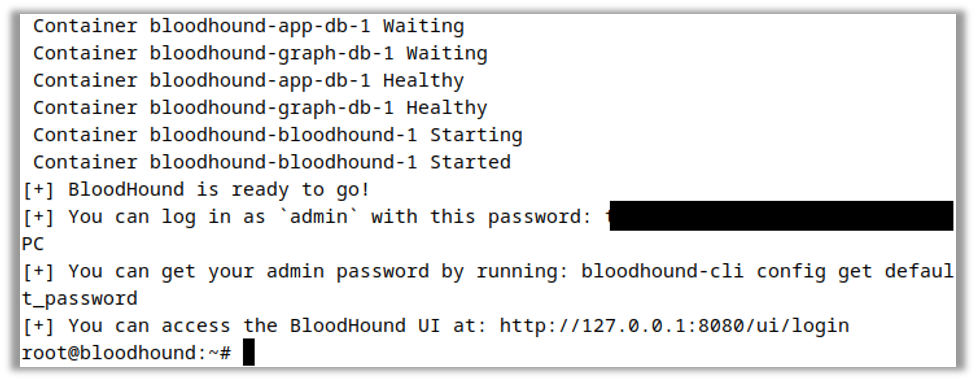
I then logged into the interface and uploaded some boilerplate data from a local lab for testing purposes.
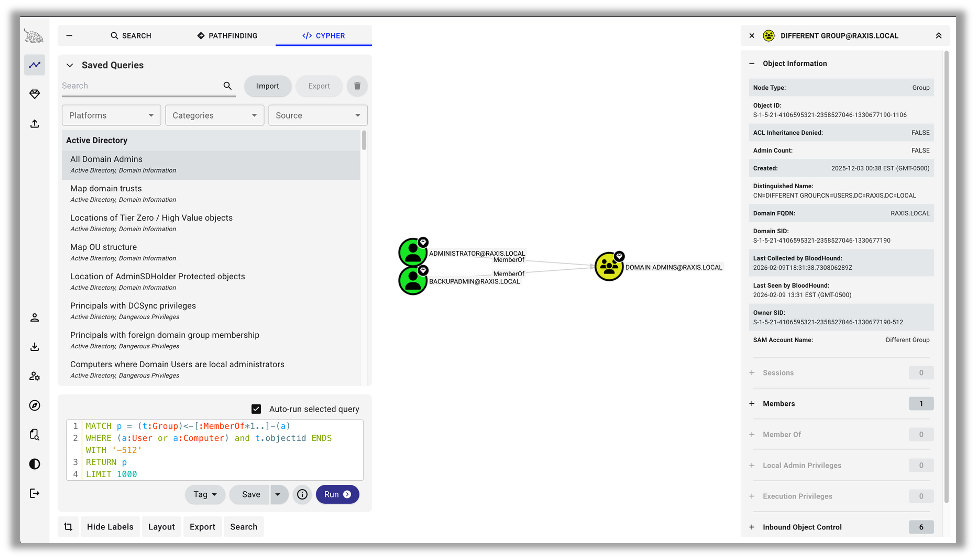
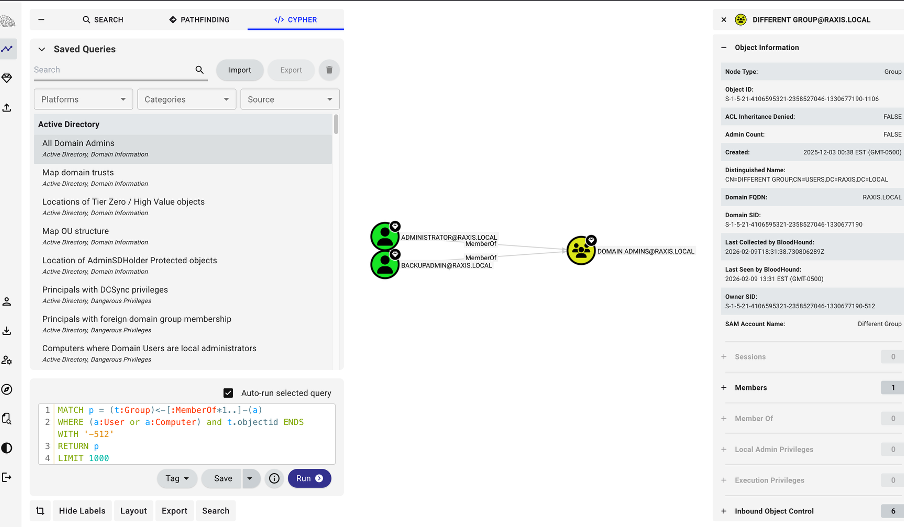
Tip: The saved queries are a great place to start when searching for potential routes to administrative access to systems or Active Directory domains.
Data Collection
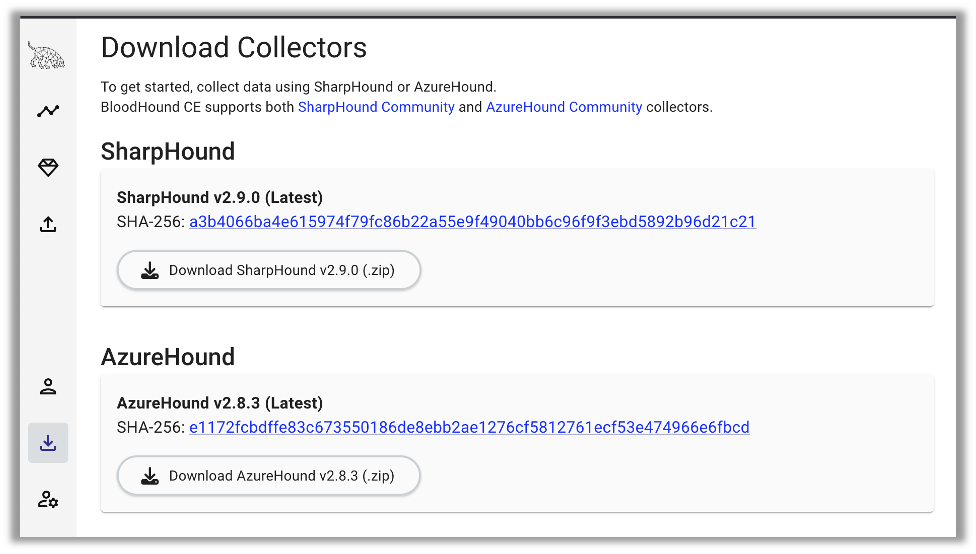
Let’s get into how to get data for BloodHound CE. Unfortunately, the legacy collectors don’t work with the new version. However, the new interface makes it easy to download the collectors that match your version.
That being said, most of the time when I collect data for BloodHound, I use the python collectors in Kali Linux. This was the main reason in my delay to moving to the new version, as the community took time to catch up and build out the new collectors.
Recently Kali introduced Bloodhound-Ce-Python into their package manager. This is an easy to install package of dirkjanm’s new CE ingestor.
At this point, per Dirkjanm’s own readme, BloodHound.py currently has the following limitations:
Supports most, but not all BloodHound (SharpHound) features. Currently GPO local groups are not supported, all other collection methods are implemented.
When I run it, I normally I do all the collections, zip the file (makes it easier to upload), pass the domain, and give it a username and password. Sometimes the testing machine can’t determine where the domain controllers are, so it may be necessary to specify their location by passing it the -ns flag with the IP of the domain controller or other name server.
bloodhound-ce-python -u administrator -p ‘<password>’ –zip -op ce-test -d raxis.local -ns 10.110.110.2 -c all
Have Fun
This wraps up how to get started with BloodHound CE. It’s a great tool for every pentester and opens up many potential attack paths to help build a full picture of internal network attack paths and remediation advice for customers.
If you found this tutorial useful, take a look at our other tutorial blogs as well.

Andrew Trexler
About The Exploit
The Exploit is written by Raxis penetration testers. Every post is a technical writeup from someone who runs engagements for a living, with code, command output, and the reasoning behind each step. Topics include exploit research, vulnerability disclosure, tool development, and the offensive techniques showing up in current client work.
Search The Exploit Blog
Raxis Discovered Vulnerabilities
View the CVEs and bugs that Raxis pentesters have uncovered and submitted.
Work With the Pentesters Who Wrote This Blog
The engineers behind these posts run real engagements every week. Put them on your network, web apps, APIs, or cloud and see what an attacker would find first.
Blog Categories
- AI
- Careers
- Choosing a Penetration Testing Company
- Exploits
- How To
- In The News
- Injection Attacks
- Just For Fun
- Meet Our Team
- Mobile Apps
- Networks
- Password Cracking
- Patching
- Penetration Testing
- Phishing
- PTaaS
- Raxis Discovered Vulnerabilities
- Raxis In The Community
- Red Team
- Security Recommendations
- Social Engineering
- Tips For Everyone
- Web Apps
- What People Are Saying
- Wireless
