
One of the first steps in any penetration test is performing reconnaissance on the target network. For both internal and external tests, one of the major initial attack vectors is through default credentials or misconfigured web applications and management interfaces. Today we’re going to take a look at GoWitness, a command line utility that takes screenshots of websites and makes them available in an easily browsable dashboard for quick manual review.
Getting Started
GoWitness can be installed on Kali Linux with a simple command:
apt install gowitnessOnce installed you can run a quick scan on a list of target URLs:
gowitness scan file -f <filename> --write-dbAdding the --write-db flag causes it to write a SQLite database of the results. Screenshots are stored in the screenshots directory that is created in the current folder.
During a test where I may have multiple networks or multiple runs of GoWitness, I like to create a subdirectory to run GoWitness from. I use this to keep my GoWitness results separated from each other.
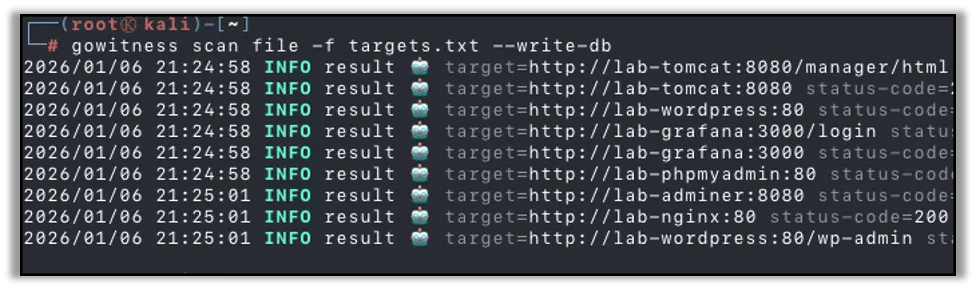
While running, GoWitness will report to the console any websites it finds and the status of each. This will include the HTTP status code and if a screenshot was taken or not.
Once GoWitness stops and has completed scanning the targets, you can run the following command to start a local web server on port 7171:
gowitness report server
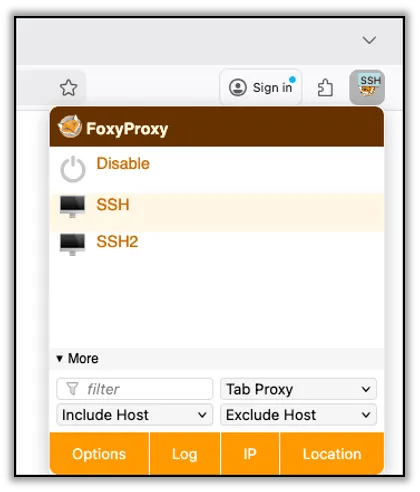
During an internal network pentest, where you are accessing the target environment from a remote host, you can setup an SSH tunnel and use FoxyProxy with Firefox to access the GoWitness dashboard.
First, connect to your system via SSH with the -ND <port> flag to initiate a SOCKS proxy on the specified port:

Next, configure Firefox to use that SSH proxy with FoxyProxy:
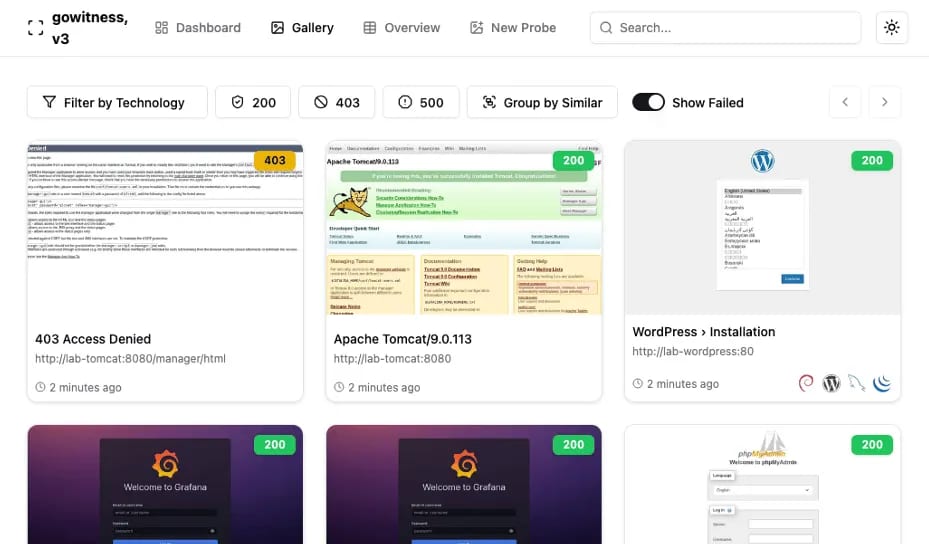
You can then browse to http://localhost:7171 and view the GoWitness dashboard. From the Gallery page you can quickly and easily see screenshots of the web hosts. In this example I can quickly identify a Tomcat server, a Grafana instance, and what appears to be a WordPress instance that was not fully configured.
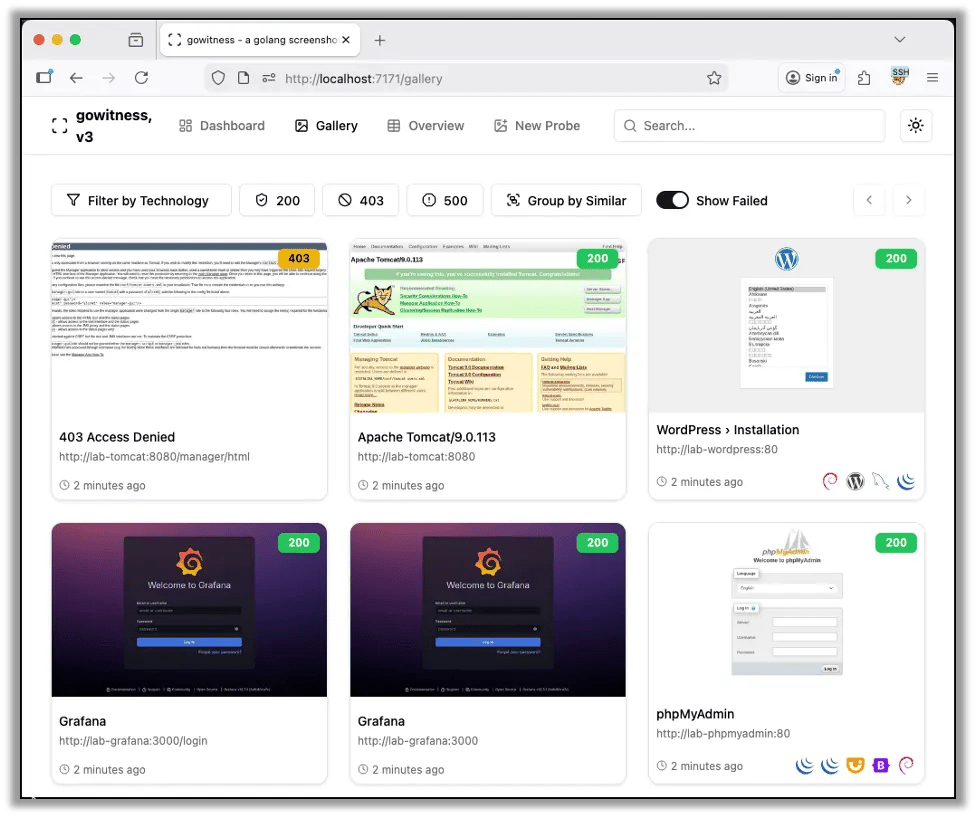
This gives us a quick and easy method of identifying potential targets for further attacks and enumeration.
GoWitness Tips
- You can click the Group by Similar button in the Gallery to group similar screenshots together. This is very useful to bring all of the IIS default documents, ESXI login pages, and printer login pages together so that you can easily identify the hosts with these particular applications.
- Before running GoWitness, create a new directory to keep the GoWitness files together in a single place. This is useful if you are scanning a particular subnet now, such as a development subnet, and plan to scan a production subnet later. This way you always know which results you are viewing.
- Use SSH SOCKS tunnels to access GoWitness reports from your remote attack box.
Winding Up
An important part of internal network penetration testing and continuous penetration testing is mapping out the network so that you prioritize your time and efforts wisely. GoWitness is a big help with this by helping to clearly enumerate and organize webpages within the network for further testing.
If you enjoyed this post, check out our post on Masscan, another great tool for internal network penetration tests.