
Previously Jason went over the how to jailbreak an iOS device for mobile app testing. There’s more than one mobile platform, and the other big one is Android. “Jailbreaking” an Android device is commonly referred to as “rooting” and is another important skill set for mobile application penetration testing.
Some device manufactures make rooting devices difficult, requiring exploits to get the job done. Google, the creator of Android and the Pixel line of devices, makes it easy. Instead of searching for exploits and chaining them together to get root, you can essentially ask nicely, and the device will just give it to you. In this post I’ll go over the process of rooting a Google Pixel 8.
Note: Going through this process will wipe the all the data from the device.
Step 1: Download the things
First the SDK Platform Tools for your device (laptop/computer): https://developer.android.com/tools/releases/platform-tools
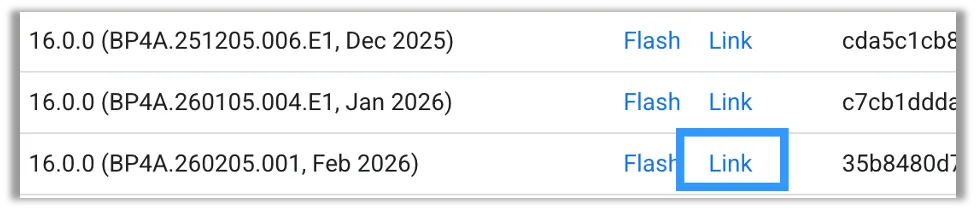
Then the factory image for your mobile device: https://developers.google.com/android/images
If you’re not using a Pixel device, you may need to get the image from elsewhere.
And the latest version of Magisk from their GitHub: https://github.com/topjohnwu/Magisk
Personally, I just download the newest version. No sense in being on an old version since it’s easy to root. Make sure to get the whole download by using the link. The version should match the one on the phone, so, if you don’t fully update the phone, make sure to match the version.
Step 2: Prep the Phone
The first thing you need to do is to enable developer options and turn on OEM unlocking and USB debugging. In the Settings app go to About phone and find the Build number. Now just start tapping the Build number option.
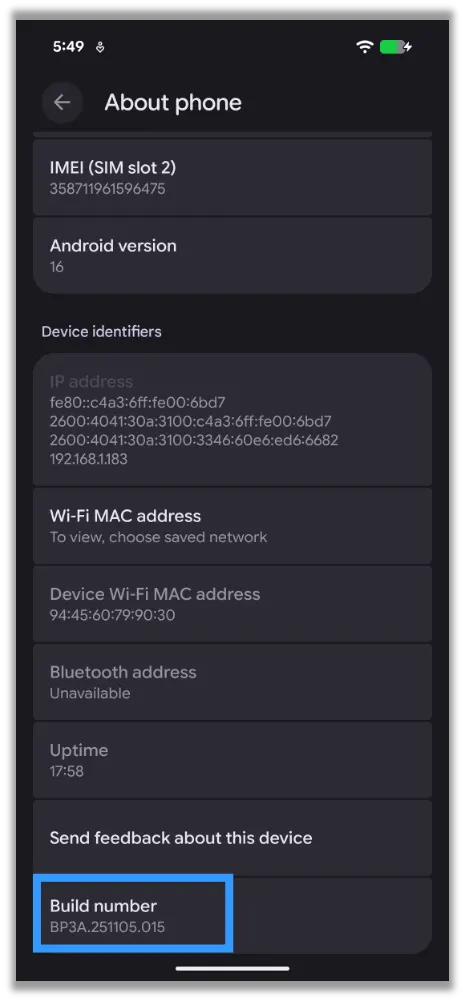
For those eagle-eyed readers, yes, the build number here is different than the one I downloaded. I did update the phone to the latest version after unlocking the bootloader.
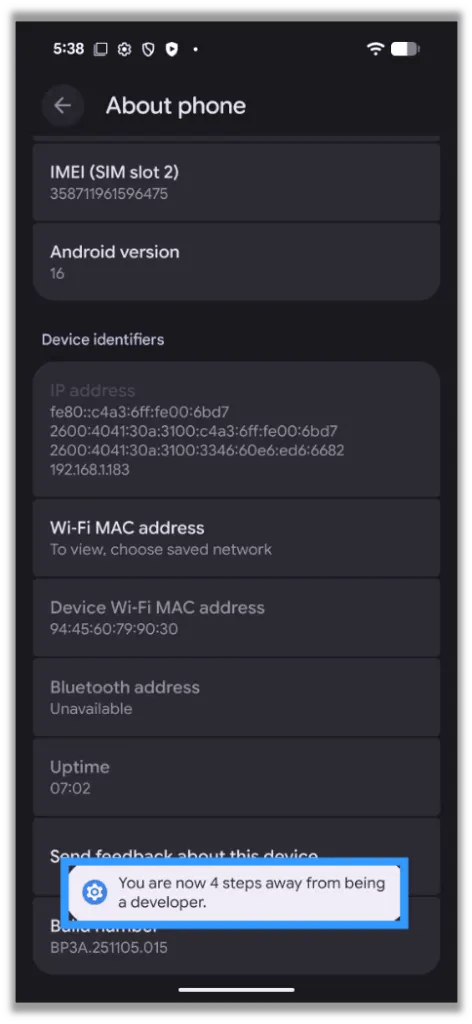
Eventually you’ll see a message about only needing to tap it X number more times.
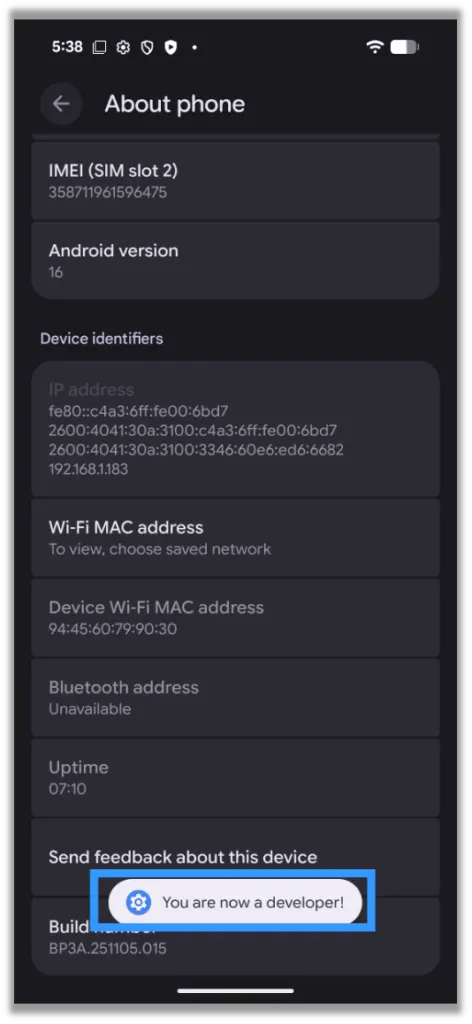
After enough times tapping Build number, you’ll enable Developer Mode.
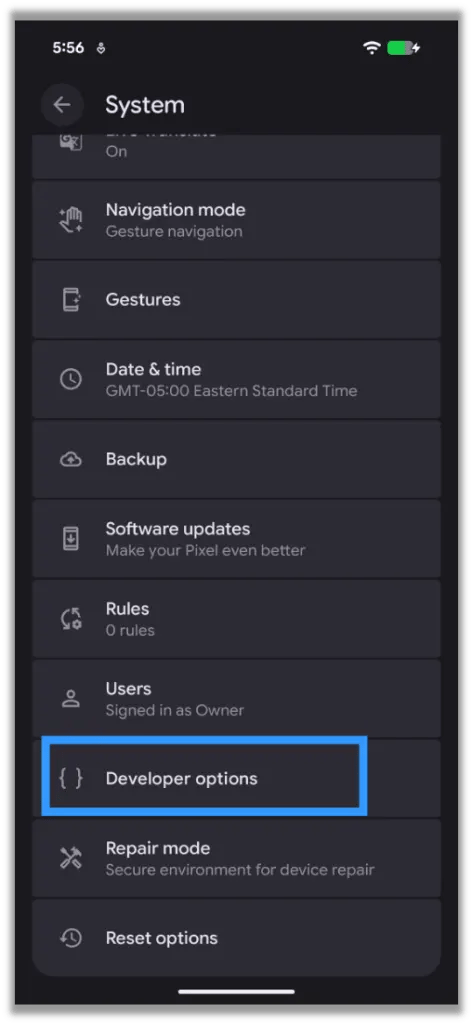
Once developer mode is enabled, you’ll have a new Developer options item in the System menu.
Next, you’ll enable OEM unlocking:
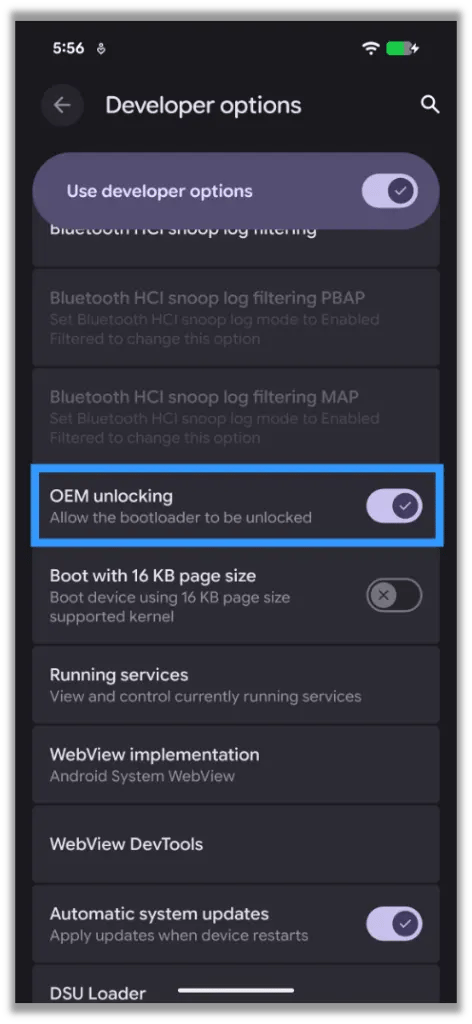
And you’ll enable USB debugging:
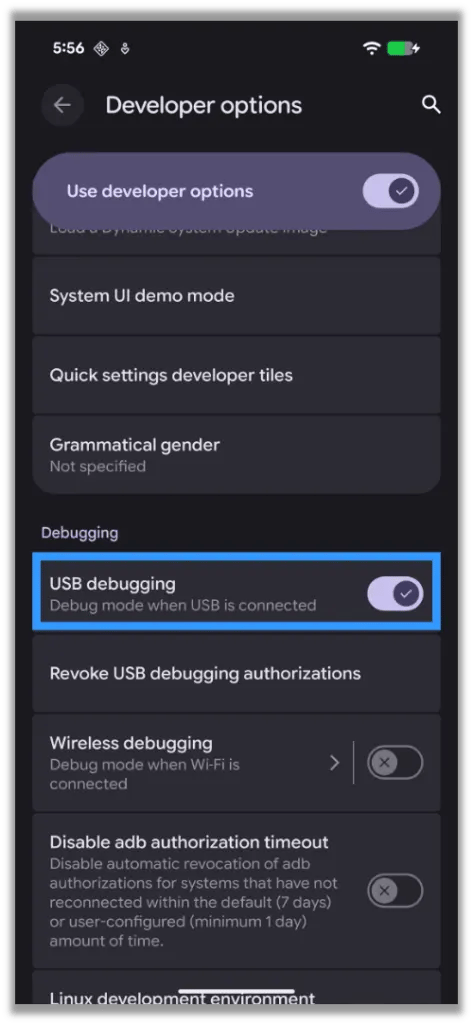
Now, if you plug in the phone and run the adb devices command from the platform tools downloaded earlier, you’ll get a prompt on the phone to allow USB debugging.
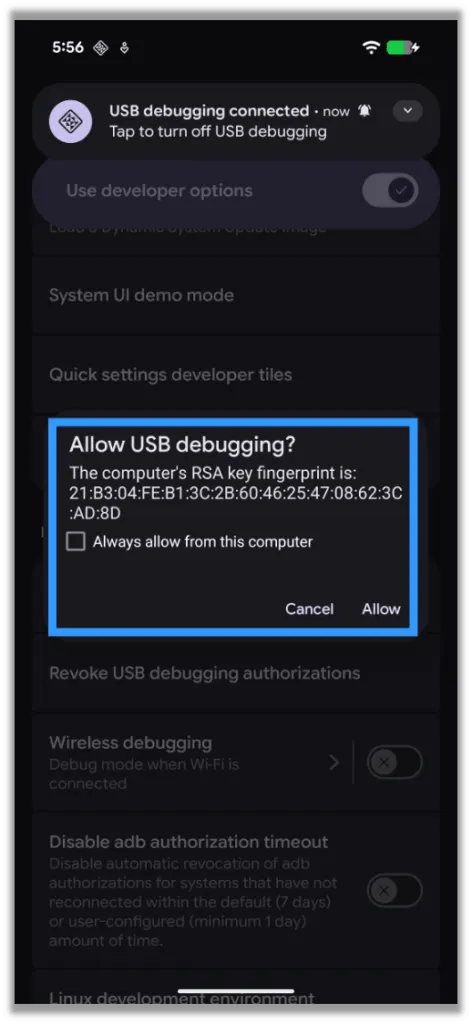
Make sure to approve the debugging.
Now you can unlock the bootloader. First enter fastboot mode by running:
./adb reboot bootloader
You should see a screen which looks like this.
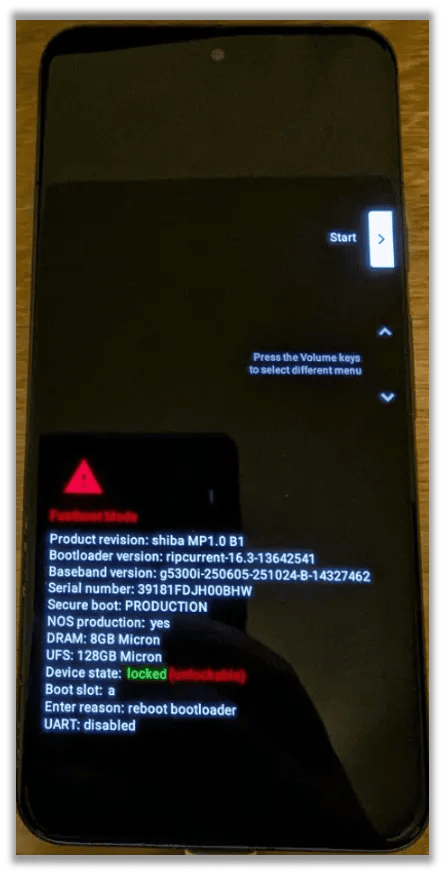
Now run:
fastboot flashing unlock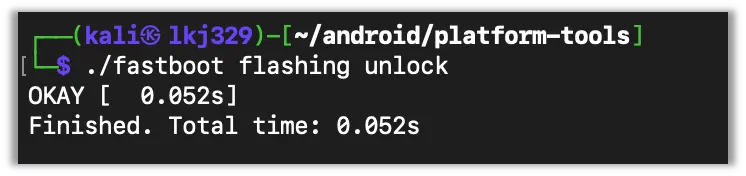
You should be greeted by a screen saying this is potentially dangerous.
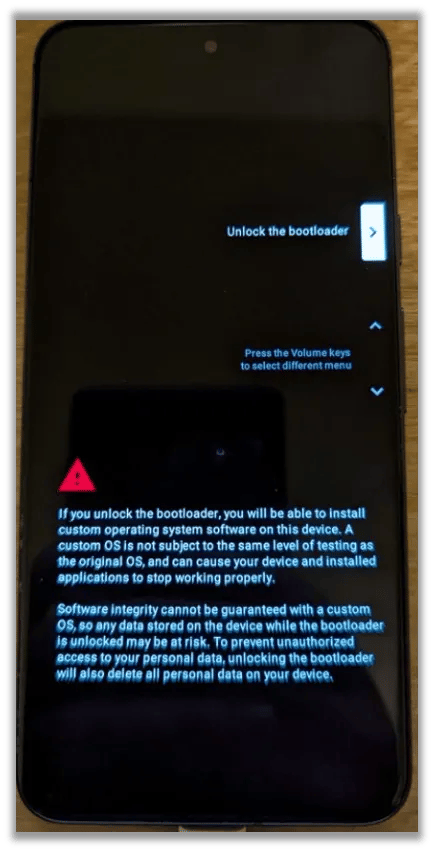
It will show you a security waring and require you to confirm your intent. Now unlocking the bootloader could expose your phone to additional vulnerabilities which could leak your data if the phone is stolen. But since we’re rooting the device to make mobile app testing more powerful we need to take this step. There are many things you can do with a rooted device. And data is still encrypted, but make sure you understand potential risks, especially if it’s going to be your daily driver and not just a testing device like mine is here.
If the plan is to root and unlock, continue following along as we go through the messages and select the option to unlock the bootloader. After you unlock the bootloader, you will return to the Fastboot menu where it should say the device is unlocked.
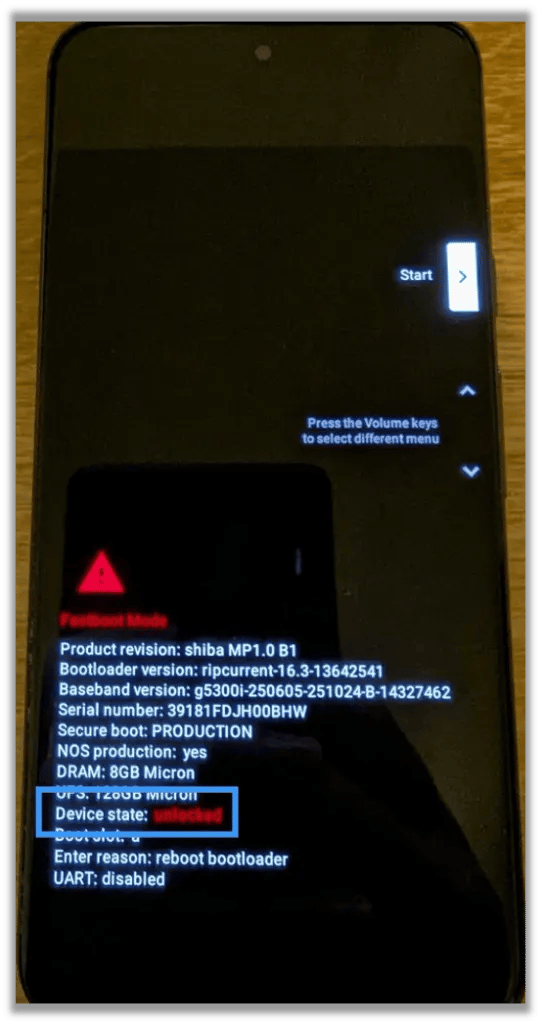
You can now reboot the device. You’ll find that the device has been reset, so you’ll need to setup the device again and re-enable developer mode and USB debugging.
Rooting the Device
After getting the device ready again, you’ll start by installing Magisk. You should have downloaded the APK already, as noted earlier.
./adb install ../Magisk-v30.7.apk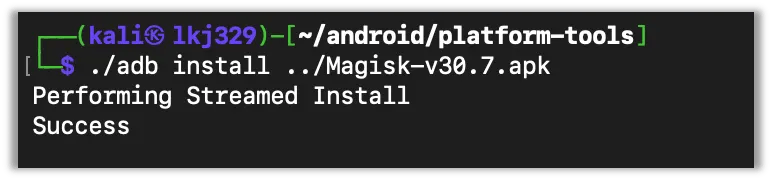
Next, you can unzip the device image you downloaded earlier. Locate the init_boot.img file and upload it to the device. There are several ways of doing this, but I prefer adb.
./adb push ../shiba-bp4a.260205.001/init_boot.img /sdcard/Download
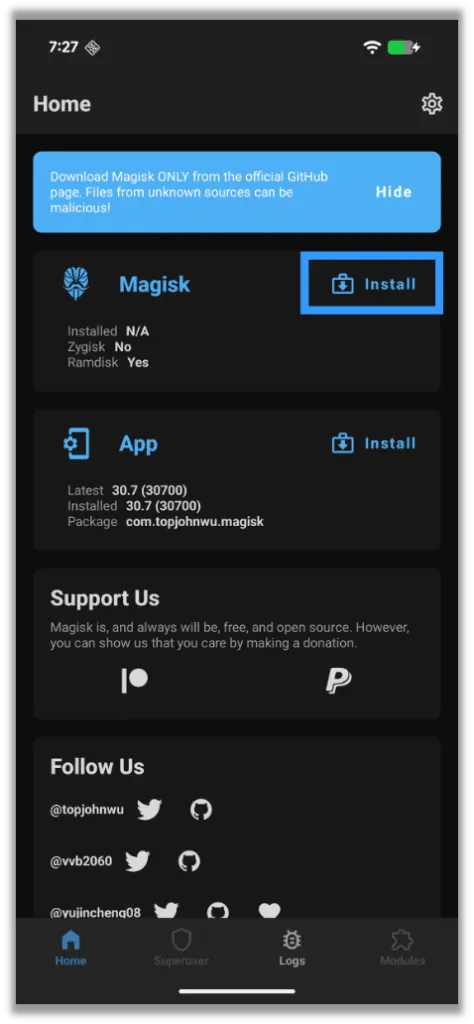
Now open the Magisk app on the device and select install.
Choose the Select and patch a file option.
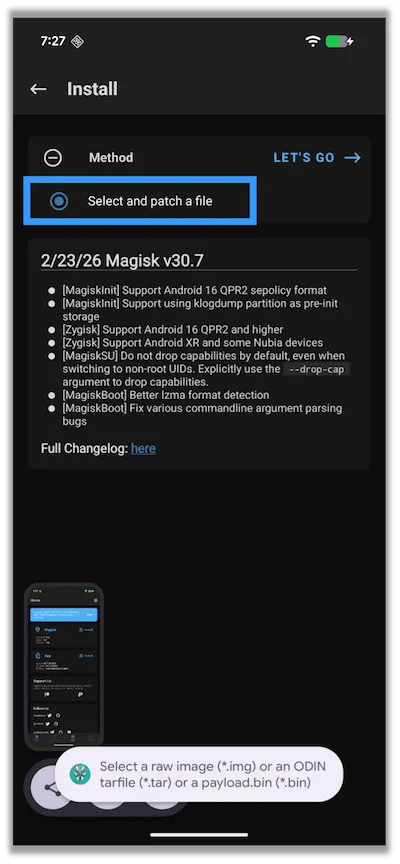
That should bring you to a file browser. Find the init_boot.img file you uploaded earlier and select it. You should be brought back to the same screen as before. Now click Let’s Go.
It will bring you to a new screen. Eventually it will output the filepath where it wrote the file and show a message All done!
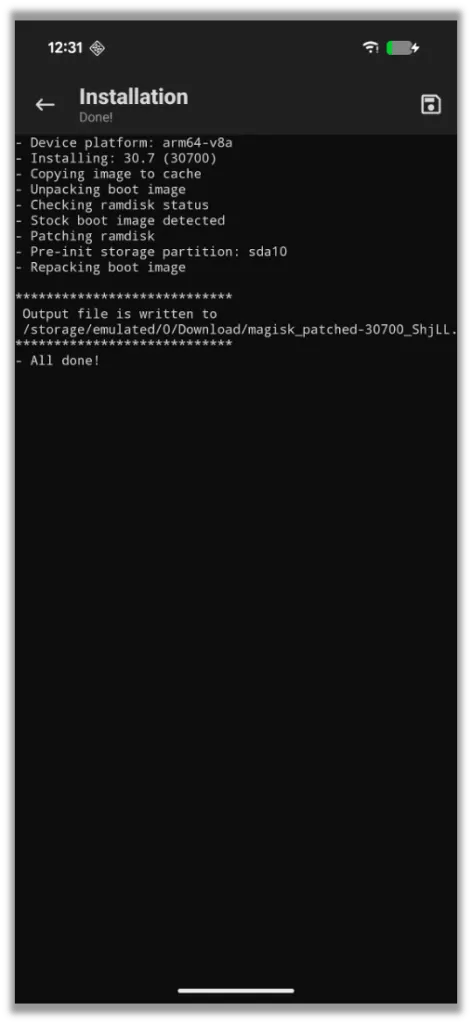
Download the modified file back to the computer. Again, there are several ways of accomplishing this.
Now put the device back into Fastboot mode as before and flash the patched image.
./fastboot flash init_boot [Magisk File]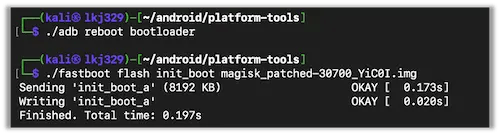
After it finishes flashing, you can reboot the device.

After the phone boots up, open the Magisk app. It should now say that Magisk is installed.
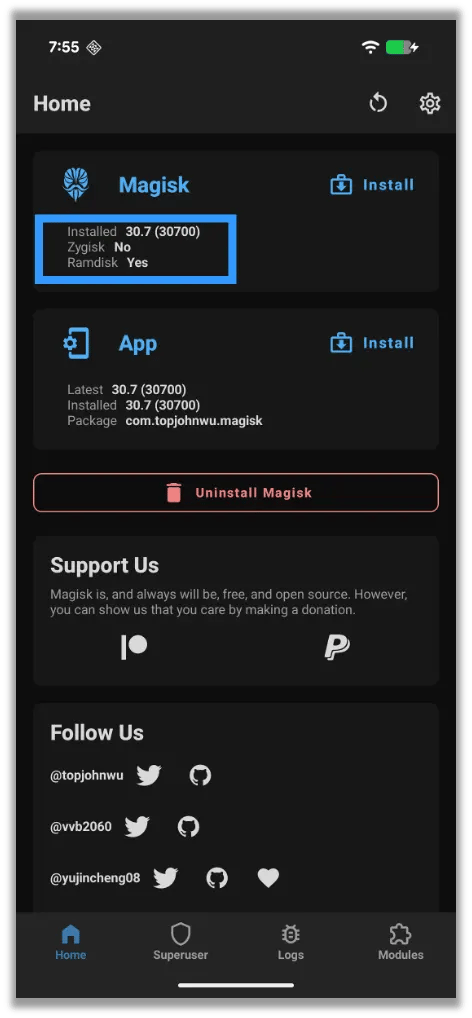
This means the phone is rooted, but let’s confirm with adb. First let’s open a shell with adb shell.
Then switch to the root user with su. You should get a confirmation pop-up message on the phone
./adb shell
su
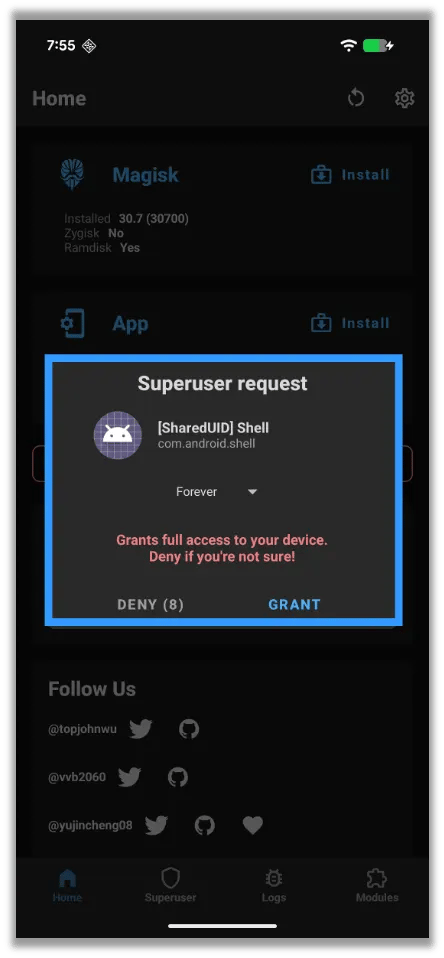
Go ahead and grant the request. You should now have a root shell. Use the id command to confirm.

And That’s It
The process with Pixel devices should be similar with different models, potentially differing in which file you patch. Some require you to patch boot.img and others, like this one, init_boot.img.
Whether you’re a penetration tester or a pentest customer looking to understand how mobile application pentests work, I hope this tutorial has been useful. Pentesting mobile applications is an important part of the DevSecOps process to protect mobile app users from security risks. If you enjoyed this walk-through, please check out others in our How To series.