

Lead Pentester Andrew Trexler walks us through creating a simple AD environment.
Whether you use the environment to test new hacks before trying them on a pentest, or you use it while learning to pentest and study for the OSCP exam, it is a useful tool to have in your arsenal.
The Basics
Today we’ll go through the steps to set up a Windows Active Directory test environment using Proxmox to virtualize the computers. In the end, we’ll have a total of three connected systems, one Domain Controller and two other computers joined to the domain.
Setting up the Domain Controller (DC)
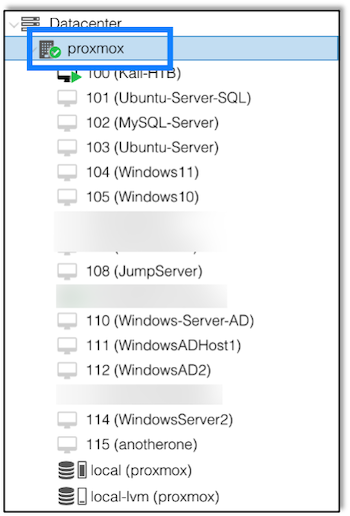
The first step is to setup a new virtualized network that will contain the Windows Active Directory environment. Select your virtualization server on the left:
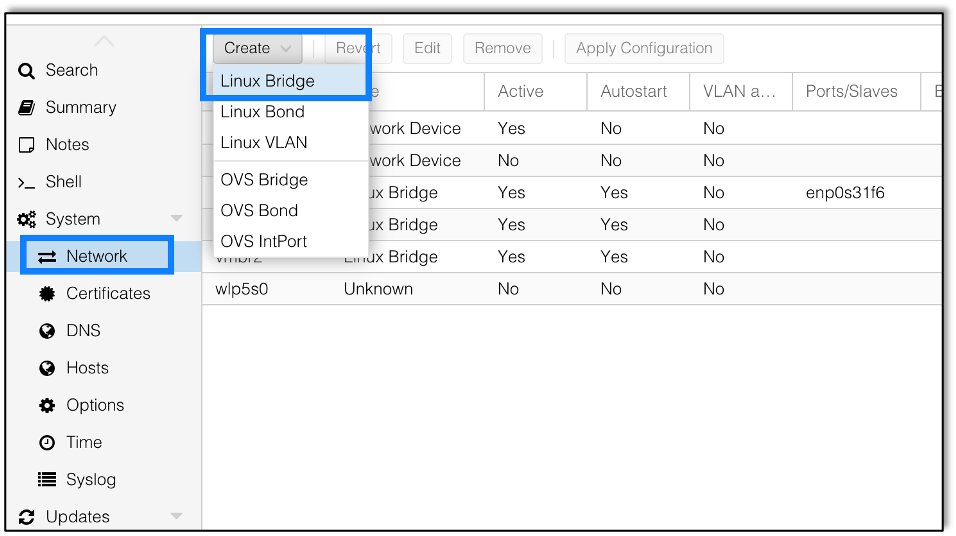
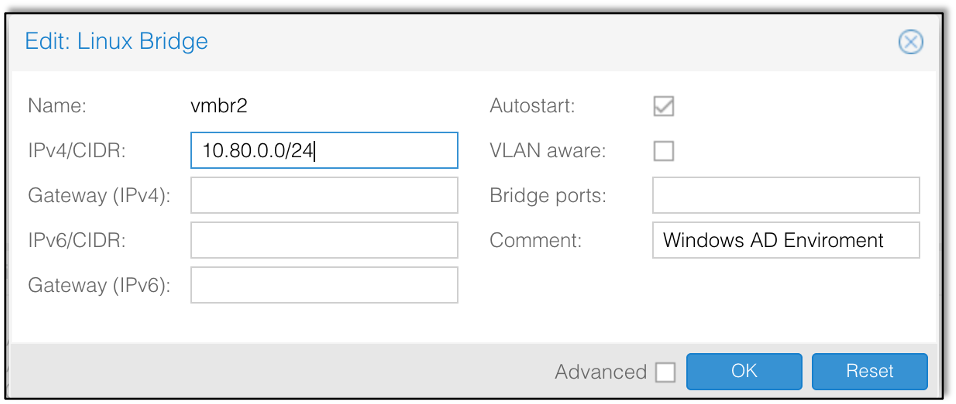
This is a Windows based environment, but we’re using a Linux hypervisor to handle the underlying network architecture, so under System, select Network, and then create a Linux Bridge, as shown in Figures 2 and 3:
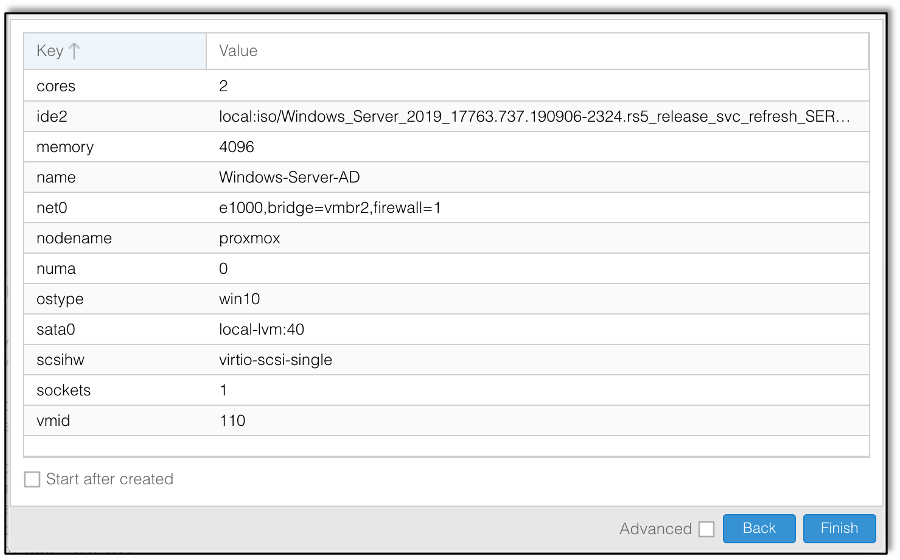
After setting up the network, we provision a new virtual machine where we will install Windows 2019 Server. Figure 4 shows the final configuration of the provisioned machine:
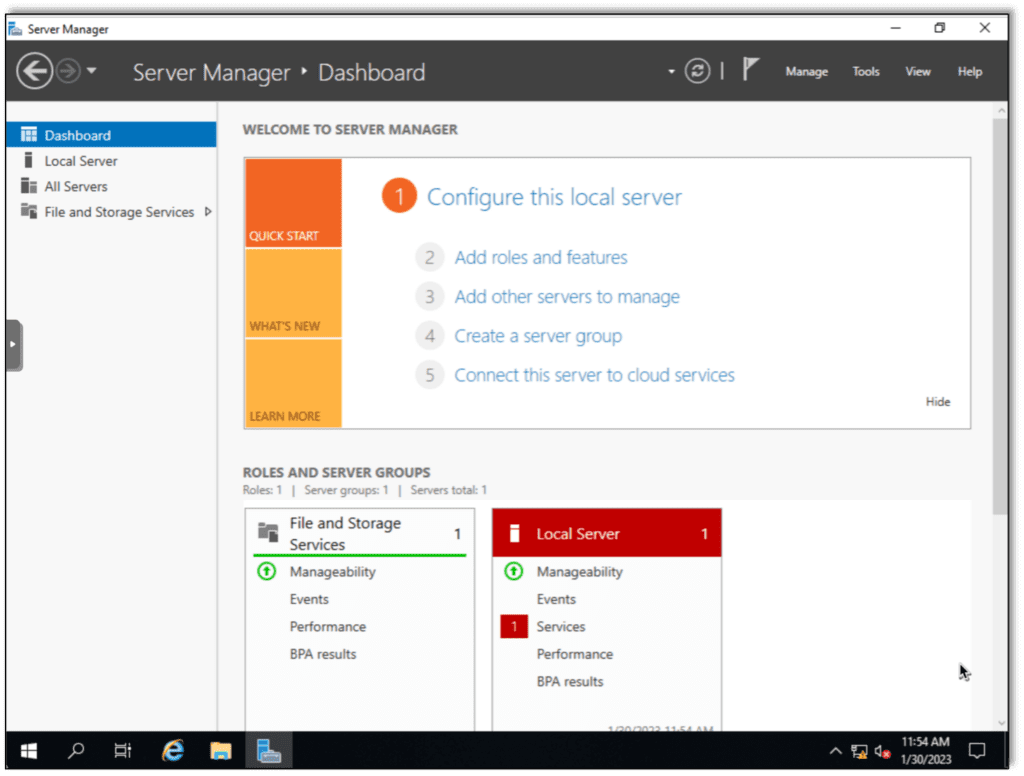
The next step is to install Windows 2019 Server. While installing the operating system make sure to install the Desktop Experience version of the operating system. This will make sure a GUI is installed, making it easier to configure the system.
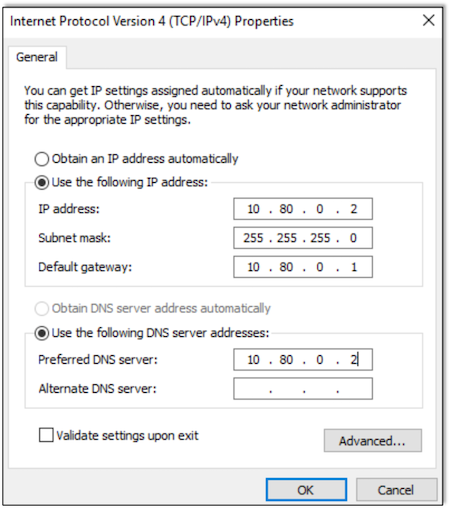
Now that we have a fresh install, the next step is to configure the domain controller with a static IP address. This will allow the server to function as the DHCP server. Also make sure to set the same IP as the DNS server since the system will be configured later as the domain’s DNS server.
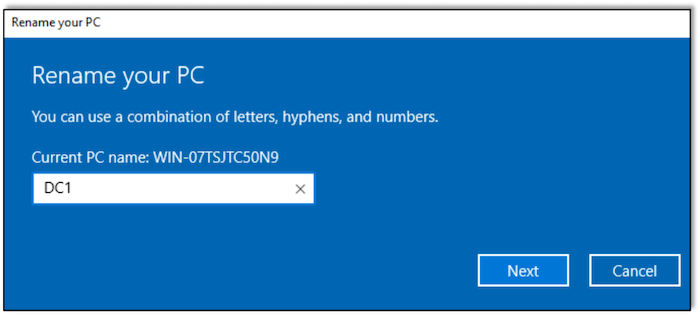
In order to make things easier to follow and understand later, let’s rename the computer to DC1 since it will be acting as our domain controller on the Active Directory domain.
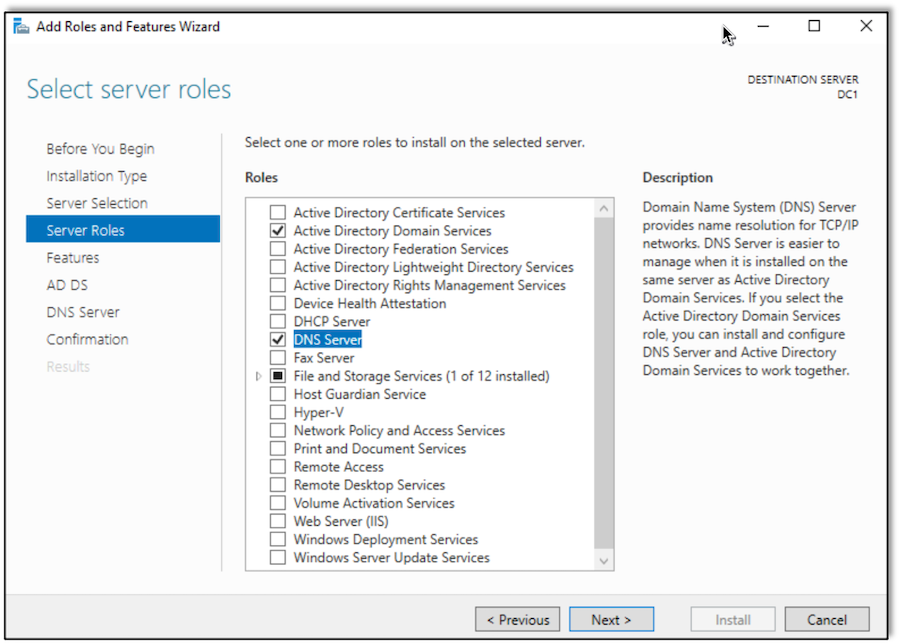
Next, configure the system as a domain controller by using the Add Roles and Features Wizard to add the Active Directory Domain Services and DNS Server roles. This configuration will allow the server to fulfill the roles of a domain controller and DNS server.
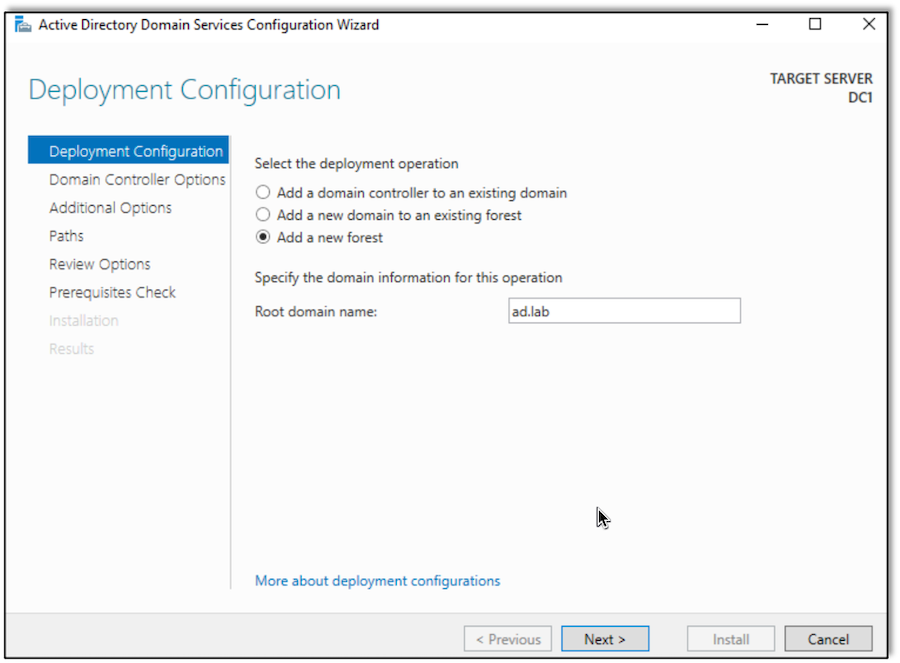
After the roles are installed, we can configure the server and provision the new Active Directory environment. In this lab we will use the domain ad.lab. Other than creating a new forest and setting the name, the default options will be fine.
Setting Up the DHCP Service
The next step is to configure the DHCP service. Here we are using a portion of the 10.80.0.0/24 network space, leaving enough addresses available to accommodate static IP addressing where necessary.
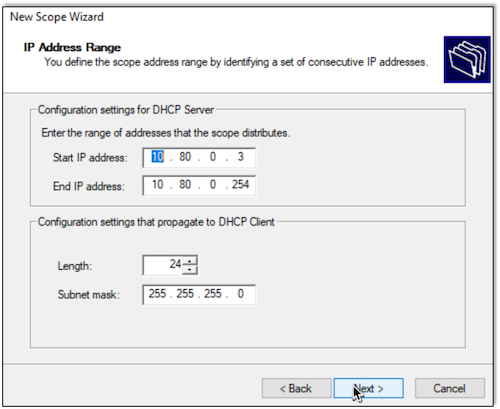
There is no need for any exclusions on the network, and we will set the lease to be valid for an entire year.
Adding a Domain Administrator and Users
Additional configuration is now required within the domain. Let’s add a new domain administrator and some new domain users. Their names and passwords can be anything you want, just make sure to remember them.
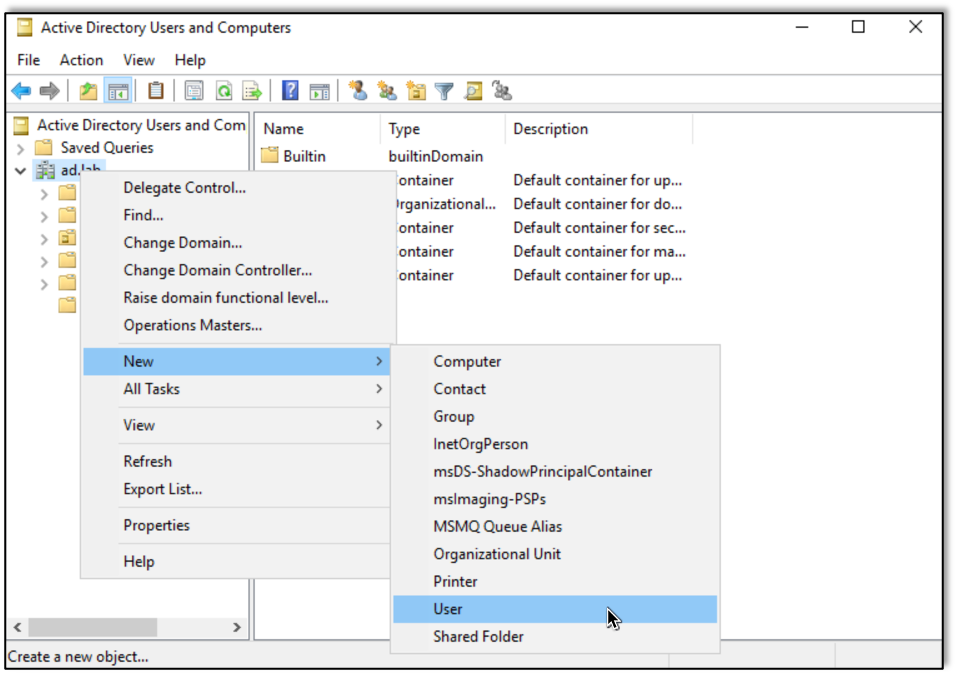
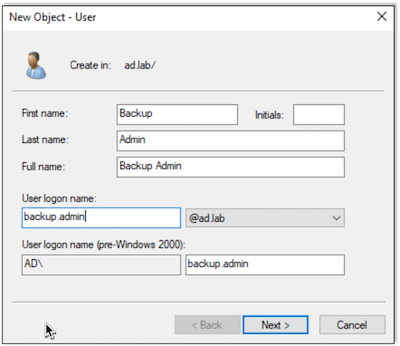
First we create the Domain Administrator (DA):
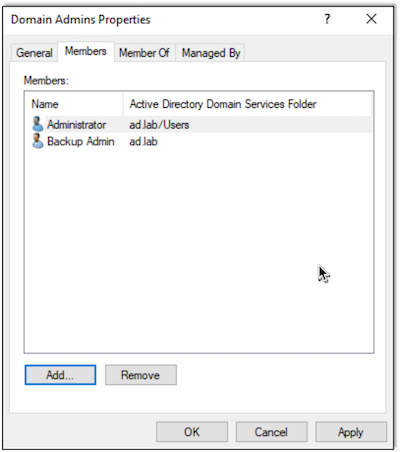
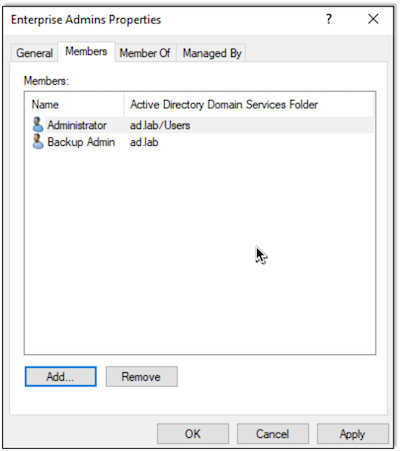
Here we also make this user an Enterprise Admin (EA) by adding them to the Enterprise Admins group:
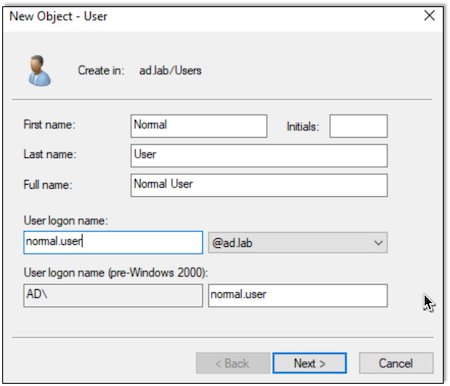
Next we will add a normal user to the domain:
Creating Windows PC
At this point we should have a functional Active Directory domain with active DHCP and DNS services. Next, we will setup and configure two other Windows 10 machines and join them to the domain.
The first step is to provision the resources on the Proxmox server. Since our test environment requires only moderate resources, we will only provision the machines with two processor cores and two gigabytes of RAM.

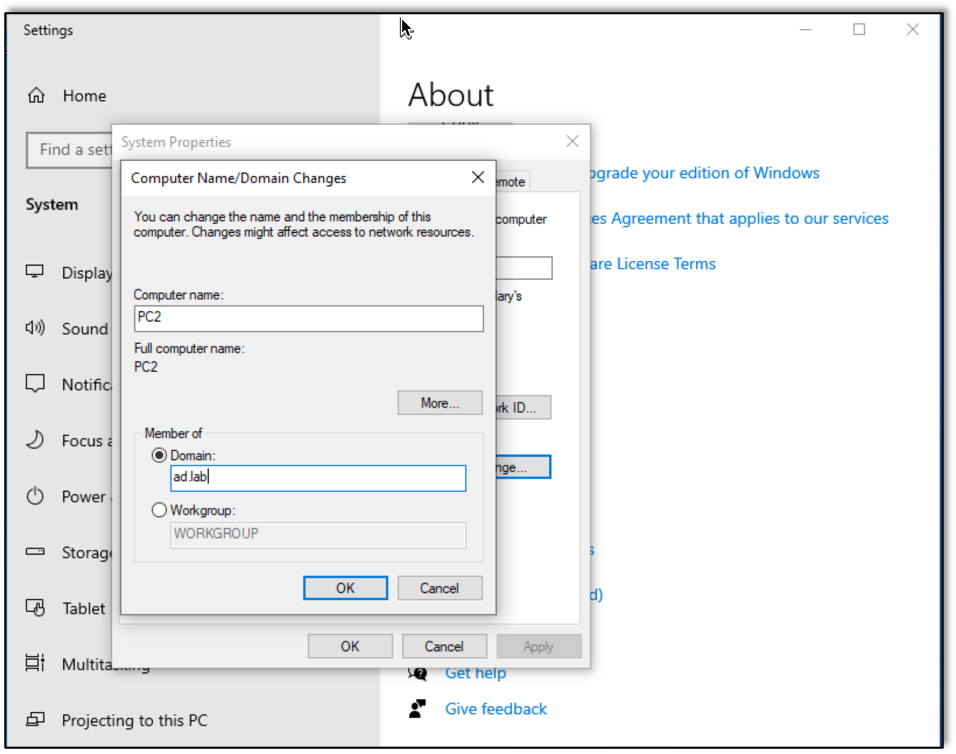
Then we install Windows 10 using the default settings. Once Windows is installed, we can open the Settings page and join the system to the ad.lab domain, changing the computer name to something easy to remember if called for.
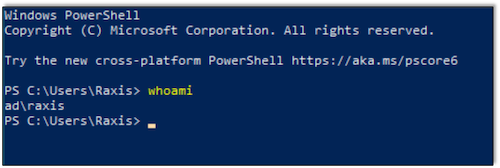
Adding the system to the domain will require us to enter a domain admin’s password. After a reboot we should be able to login with a domain user’s account.
SMB Share
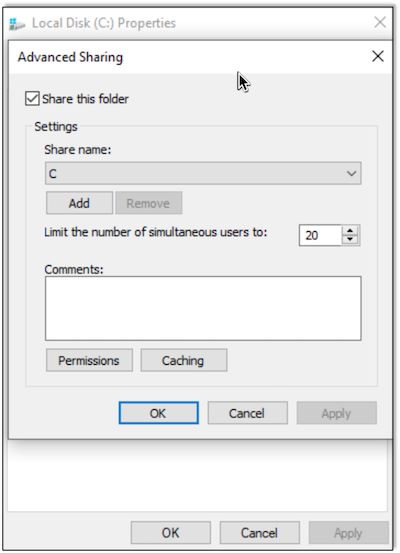
At this point, there should be three computers joined to the Active Directory domain. Using CrackMapExec, we can see the SMB server running on the domain controller but no other systems are visible via SMB. So let’s add a new network share. Open Explorer.exe, select Advance Sharing, and share the C drive.
I don’t recommend sharing the entire drive in an environment not used for testing, as it’s not secure: the entire contents of the machine would be visible. Since this is a pentest lab environment, though, this is exactly what we are looking for.
Creating the share resulted in the system exposing the SMB service to the network. In Figure 20 we verified this by using CrackMapExec to enumerate the two SMB servers:

Conclusion
At this point, our environment should be provisioned, and we are ready to test out different AD test cases, attacks, and other shenanigans. This environment is a great tool for ethically learning different exploits and refining pentesting techniques. Using a virtual infrastructure such as this also provides rollback capability for running multiple test cases with minimal downtime.
I hope you’ll come back to see my next posts in this series, which will show how to use this environment to test common exploits that we find during penetration testing.
Want to learn more? Take a look at the next part in our Active Directory Series.

Andrew Trexler
About The Exploit
The Exploit is written by Raxis penetration testers. Every post is a technical writeup from someone who runs engagements for a living, with code, command output, and the reasoning behind each step. Topics include exploit research, vulnerability disclosure, tool development, and the offensive techniques showing up in current client work.
Search The Exploit Blog
Raxis Discovered Vulnerabilities
View the CVEs and bugs that Raxis pentesters have uncovered and submitted.
Work With the Pentesters Who Wrote This Blog
The engineers behind these posts run real engagements every week. Put them on your network, web apps, APIs, or cloud and see what an attacker would find first.
Blog Categories
- AI
- Careers
- Choosing a Penetration Testing Company
- Exploits
- How To
- In The News
- Injection Attacks
- Just For Fun
- Meet Our Team
- Mobile Apps
- Networks
- Password Cracking
- Patching
- Penetration Testing
- Phishing
- PTaaS
- Raxis Discovered Vulnerabilities
- Raxis In The Community
- Red Team
- Security Recommendations
- Social Engineering
- Tips For Everyone
- Web Apps
- What People Are Saying
- Wireless
